A Docker Container is a very popular service that can be used for virtualization services that can reduce a significant amount of resources and the cost of an organization’s infrastructure. We will not go into details about the docker but only focus on how we can use it in our AWS infrastructure.
In this post we will show how to install a Docker container in AWSwe will install a Docker container in AWS in the easiest way possible, so let’s get started.
First, we have to install the Docker container engine. So for that login to the running EC2 instance, for our demo, we are connecting to a running instance via EC2 Instance connect.
Next, install the Docker container engine by issuing the command:
sudo amazon-linux-extras install docker

Next up you can start the docker service using the command:
sudo service docker start
We have to issue a number of commands to interact with the Docker service and since the user that we are logged in “ec2-user” doesn’t have enough privilege to interact with the Docker container engine so first, we have to allow privileges to the user. For that, we can add the user to the Docker group which will then have enough privileges to access all the services of the Docker container engine. So for that enter the following command:
sudo usermod -a -G docker ec2-user
To make the privileges to be active we need to log out and log back into the EC2 instance so exit the session and login again, check if the permission is working or not by issuing the command:
docker ps
Now the docker service is installed
For building a docker image we need to make a docker file that contains the set of commands that needs to be issued while building the docker. For our example, we will be building a web server to host a sample website.
For that, we need to build a docker file and a sample test web page.
1. Make the directory
makedir webtest
cd webtest
2. Let’s create a file “Dockerfile” (note: filename not to be changed)
touch /webtest/Dockerfile
3. Create a sample web page to test name it index.html
vim /webtest/index.html
Type in the Html code or just text if you want to just test it.
exit the file by pressing Esc and type in :wq! to save and exit the file
3. Edit the docker file .. install centos software latest, install httpd and copy index file to html folder and open port 80
vi Dockerfile
FROM centos:latest
MAINTAINER rprateek
RUN yum -y install httpd
COPY index.html /var/www/html/
CMD [“/usr/sbin/httpd”, “-D”, “FOREGROUND”]
EXPOSE 80
Exit the file by pressing ESC and entering :wq!
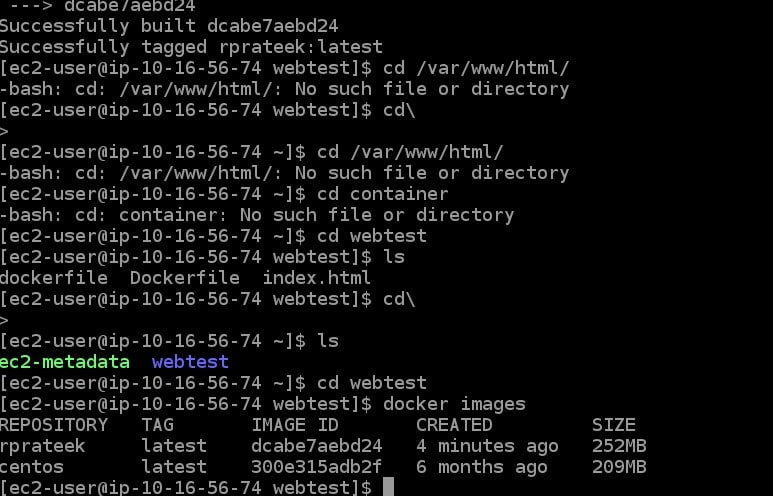
4. Build the image using the docker build file by issuing the following command:
docker build -t rprateek .
This will build the Docker image

5. Now run the webserver using the following command
docker run-t -i -p 80:80 rprateek
Ignore the message, it is just the warning message
6. Test the website going to the http:// <hostip>>/index.html
The site is up and running
Yey…
Explanation of the commands that are used in Dockerfile
Maintainer – The command is used to give information about the file or the creator.
Run – This is to install command
EPOSE – to open the port number
CMD to run the command after the container is launched.
Run is used to build the image whereas CMD is for running the inline command within the docker container itself
-D FOREGROUND – This is a HTTP server argument to run a web server in the background if we don’t use this argument the server will start and then it will stop